


Heat Shrink
Heat shrink tubing insulates, protects, and finishes compatible electrical conductors, splices, cable transitions, and terminations after the underlying connection is complete. Select tubing that can pass over the largest part of the assembly and recover tightly around the finished diameter. Where the installation needs added sealing or mechanical protection, choose a construction specifically rated for that condition. Start with expanded and recovered diameter, shrink ratio, and installation environment before narrowing the exact product.
Showing 1–20 of 67 results

Morris 68310 Cold Shrink Tube, 900 MCM - 1000 MCM, 9"
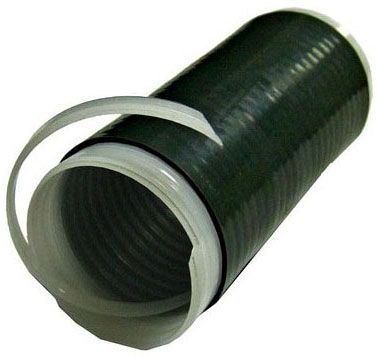
Morris 68308 Cold Shrink Tube, 500 MCM - 800 MCM, 12"

Morris 68306 Cold Shrink Tube, 500 MCM - 800 MCM, 9"

Morris 68304 Cold Shrink Tube, 2/0 AWG - 400 MCM, 9"

Morris 68302 Cold Shrink Tube, #2 AWG - 1/0 AWG, 8"
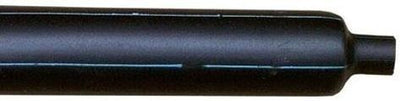
Morris 68240 Heat Shrink End Cap, 2000 - 2500 MCM, 2.75" → 1.00"

Morris 68238 Heat Shrink End Cap, 900 - 2500 MCM, 2.05" → 0.75"

Morris 68236 Heat Shrink End Cap, 500 - 1500 MCM, 1.50" → 0.50"
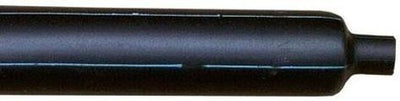
Morris 68234 Heat Shrink End Cap, 300 - 1000 MCM, 1.30" → 0.40"

Morris 68026 Flame-Retardant Heavy-Wall Heat Shrink Tubing, 2.00" → 0.63", 4 ft

Morris 68025 Flame-Retardant Heavy-Wall Heat Shrink Tubing, 1.50" → 0.47", 4 ft
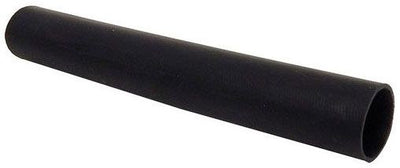
Morris 68024 Flame-Retardant Heavy-Wall Heat Shrink Tubing, 1.10" → 0.35", 4 ft

Morris 68023 Flame-Retardant Heavy-Wall Heat Shrink Tubing, 0.75" → 0.24", 4 ft

Morris 68022 Flame-Retardant Heavy-Wall Heat Shrink Tubing, 0.40" → 0.13", 4 ft

Morris 68020 Flame-Retardant Heavy-Wall Heat Shrink Tubing, 2.00" → 0.63", 12"
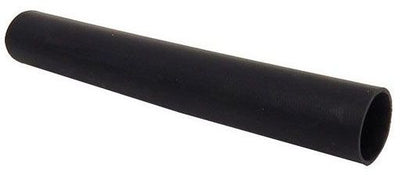
Morris 68015 Flame-Retardant Heavy-Wall Heat Shrink Tubing, 1.50" → 0.47", 8"
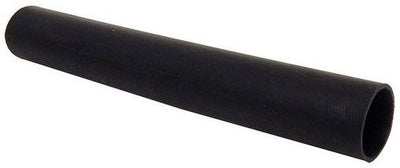
Morris 68012 Flame-Retardant Heavy-Wall Heat Shrink Tubing, 1.10" → 0.35", 12"

Morris 68011 Flame-Retardant Heavy-Wall Heat Shrink Tubing, 1.10" → 0.35", 8"
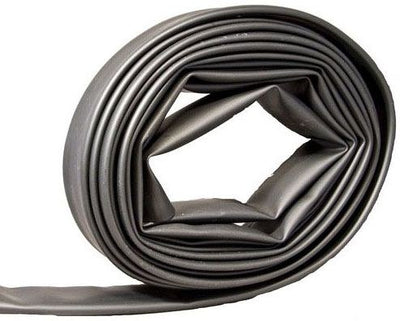
Morris 68196 Heavy-Wall Heat Shrink Tubing, 3.54" → 1.18", 25 ft Roll

Morris 68194 Heavy-Wall Heat Shrink Tubing, 2.70" → 0.87", 25 ft Roll
About Heat Shrink
How to Choose Heat Shrink Tubing for Electrical Connections
Heat shrink tubing should be chosen around the completed connection, not wire gauge alone. Measure the largest connector, barrel, or cable transition the tubing must pass over before heating, then compare that with the smaller diameter it must grip after recovery. Shrink ratio, wall construction, temperature requirements, and exposure conditions determine whether the finished sleeve will provide the insulation and protection the application needs.
- A conductor splice that still needs its electrical connection points you first to wire connectors and compression splices.
- A crimped cable termination should be matched to the correct electrical lug before heat shrink is sized.
- A cable entering an enclosure and needing strain relief calls for a cable gland or cord grip, not heat shrink alone.
- A raceway or box-entry problem belongs with electrical fittings before the conductor covering is selected.
Heat Shrink Size: Check Expanded and Recovered Diameter
Two dimensions control fit. Expanded diameter tells you what the unshrunk tubing can slide over; recovered diameter tells you how small it can become after heating. Suppose a finished connector measures 0.40 inch at its widest point while the cable jacket behind it is 0.20 inch. The tubing needs enough supplied diameter to clear the 0.40-inch section and enough recovery to grip the smaller cable section.
Choosing only by conductor gauge often misses that difference because connector barrels, terminals, and insulation transitions can be much wider than the wire itself. A sleeve that barely passes over the connector can also be difficult to position without damaging it.
Decision rule: if the tubing cannot comfortably clear the largest component and still recover below the smallest finished diameter, choose another size or shrink range.
2:1 vs. 3:1 Heat Shrink: Use Ratio to Handle Diameter Changes
Shrink ratio describes how much the tubing can reduce from its supplied size toward its fully recovered size. A higher ratio is useful when one sleeve must cross a relatively large connector and then shrink around a noticeably smaller cable. For example, a transition from roughly 3/8 inch over a connector toward about 1/8 inch around a lead requires more recovery range than a nearly uniform cable section.
Ratio does not replace the actual dimension chart. Two products carrying the same nominal ratio can have different expanded and recovered diameters, so the real measurements still decide compatibility.
If the largest and smallest diameters are close, a lower shrink ratio may be sufficient. When the assembly has a pronounced step, a higher-ratio option may make sizing easier.
Single-Wall vs. Adhesive-Lined Heat Shrink: Match the Environment
Basic single-wall tubing can provide insulation, identification, abrasion protection, or strain relief where the exact product is rated for those functions. Adhesive-lined tubing adds a heat-activated inner layer that can help seal around the cable jacket and connector as the sleeve recovers. That makes it useful when the finished connection needs more environmental protection than a simple dry-location sleeve provides.
Consider a crimped feeder termination moving from a 1/2-inch barrel to a smaller insulated cable jacket. If moisture protection is part of the job, an appropriate adhesive-lined construction may be preferable to ordinary tubing. Lumera's cable-lug installation guide likewise identifies adhesive-lined heat shrink as a finishing option for exposed crimped connections.
Decision rule: if moisture sealing is required, use a heat-shrink system specifically rated for that exposure rather than assuming ordinary tubing becomes waterproof after heating.
Heat Shrink Specs: Wall, Temperature, Voltage and Exposure
Once size and shrink range work, check the specifications that determine whether the tubing belongs in the electrical environment. A sleeve used on a short control wire inside a dry enclosure does not face the same conditions as one installed around a larger outdoor cable termination.
- Wall construction: match flexibility and mechanical protection to the connection.
- Operating temperature: make sure the recovered tubing suits the expected service temperature.
- Recovery temperature: confirm nearby insulation and components can tolerate installation heat.
- Electrical rating: use tubing appropriate for the circuit and intended insulation function.
- Environment: verify dry, damp, wet, chemical, UV, underground, or other exposure individually.
- Finished length: provide the overlap or coverage required by the exact product instructions.
If a cable operates in a 105°C-rated environment, for example, tubing with an inadequate continuous-temperature rating should not be used simply because its dimensions fit. The electrical and environmental ratings come after geometry, but they are equally important to the final selection.
Install Heat Shrink Only After the Electrical Connection Is Correct
Heat shrink protects a connection; it does not create one. A splice still needs an approved connector, and a cable termination still needs the correct lug, conductor preparation, and crimp. Covering an under-crimped or incorrectly sized connection only hides the defect. Lumera's cable-lug crimping guide explains why conductor size, lug barrel, die, and crimp procedure have to be correct before insulation is added.
For a 6-inch finished splice assembly, cut and position enough tubing to provide the required coverage before making any irreversible connection that would prevent the sleeve from sliding into place. Apply controlled, even heat around the circumference and follow the tubing manufacturer's recovery instructions.
Decision rule: inspect and complete the electrical connection first; shrink the protective sleeve only after the underlying joint is mechanically and electrically correct.
Plan Heat Shrink Quantities, Tools and Related Hardware Together
Repeated work is easier when heat shrink is scheduled by connection type rather than ordered as miscellaneous tubing. On a project with 200 identical terminations, record the connector or lug, largest outside diameter, cable diameter, required sleeve length, environment, and heat-shrink specification once, then multiply by the verified quantity. This reduces field substitutions between tubing that looks similar but has different recovery ranges or ratings.
Also identify the connectors, crimping equipment, stripping tools, and enclosure hardware before releasing the material order. Lumera's wire connector and splicing guide provides additional context on selecting the underlying connection for conductor material, gauge, environment, and installation method.
For larger quantities or repeat electrical work, add the verified material schedule to Lumera's project quote request. Have the tubing size or required diameter range, quantity, connection type, conductor or cable size, and installation environment ready before submitting the list.
Heat Shrink Tubing FAQs
How do I choose the correct heat shrink size?
Measure both the largest component the unshrunk tubing must pass over and the smaller diameter it must grip after recovery. The expanded diameter must clear the first measurement, while the recovered diameter must be small enough for the second. Size from the finished assembly rather than conductor gauge alone.
What is the difference between 2:1 and 3:1 heat shrink?
A 3:1 shrink ratio can accommodate a larger difference between supplied and recovered diameter than a 2:1 ratio. That makes higher-ratio tubing useful around stepped assemblies such as connectors and cable jackets. The ratio alone is not enough, though; always check the exact expanded and recovered dimensions.
What is the difference between single-wall and adhesive-lined heat shrink?
Single-wall tubing is commonly used for insulation and general protection, while adhesive-lined tubing adds an inner sealing layer that flows as the sleeve recovers. For exposed crimped terminations, Lumera's crimping guide explains where adhesive-lined tubing can add moisture protection and strain relief.
Can heat shrink make a wire splice waterproof?
Not by itself. Wet, underground, or similarly exposed connections need a complete splice system rated for those conditions. Adding ordinary tubing to a dry-location connector does not change the connector's environmental rating. Start with an appropriate wire connector or splice system, then use compatible sealing components as required.
Can heat shrink replace an electrical connector?
No. Heat shrink is insulation and protection around a completed connection; it is not the conductive or mechanical joint between wires. Conductors must first be joined with the correct splice, terminal, or lug for their size, material, circuit, and application before heat shrink is installed.